
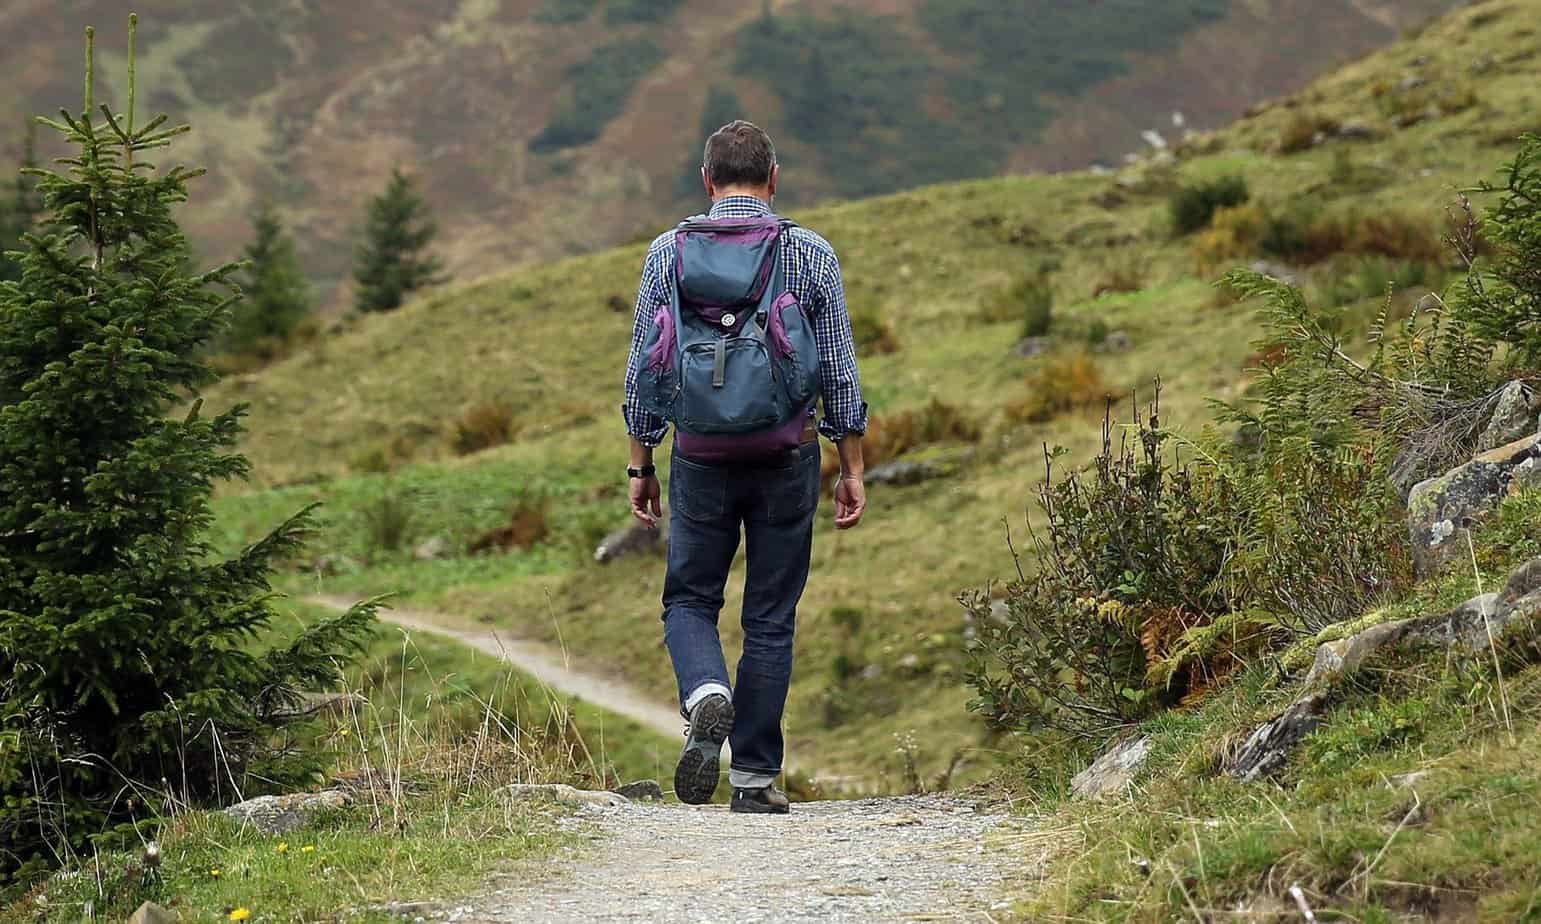
Making the step up from day-hiking to thru-hiking is a big one, and not as plain sailing or problem-free as many newcomers would expect. In addition to the obvious increase in physical demands while en route, any long-distance, multi-day (or multi-week!) hike requires a serious amount of pre-trip planning and preparation.
From camping permits and gear decisions to getting yourself in trail-worthy shape and tying up loose ends at home, most thru-hikers spend as much time prepping for their hike as they do on the trail itself.
All this, however, shouldn’t put you off. Thru-hiking is one of the most rewarding and enjoyable experiences of anyone’s lifetime. You’ll meet new friends. See amazing things. Get to know yourself better than you ever would daily grind. Make memories. Become, in the space of just a few months, more badass than you might ever have imagined.
In this article, we aim to help you negotiate the various pitfalls many thru-hikers to stumble into so you can make the most of your time on the trail and cut down on the hassles and heavy business of pre-trip logistics and planning.
Table of Contents
What is a Thru-Hike
In a few words, a thru-hike is any hike which completes a long-distance trail or segment of that trail in one season. While this definition may have blurred in the last decade or so—mainly due to the rising popularity of multi-season hikes—the gist of the description remains true.
The “Big Three” thru-hikes in the USA are the Appalachian Trail (AT), the Continental Divide Trail (CDT), and the Pacific Crest Trail (PCT), all of which measure over 2,000 miles in length.
Other famous through-hikes elsewhere in the world include the Greater Patagonia Trail (800 miles), The Great Himalaya Trail (currently 1,100 miles but an extension of a further 1,000 miles is in the offing), the Sentiero Italia (over 3,800 miles), and the Te Araroa Trail (1, 860 miles).
Common Newby Thru-hiker mistakes
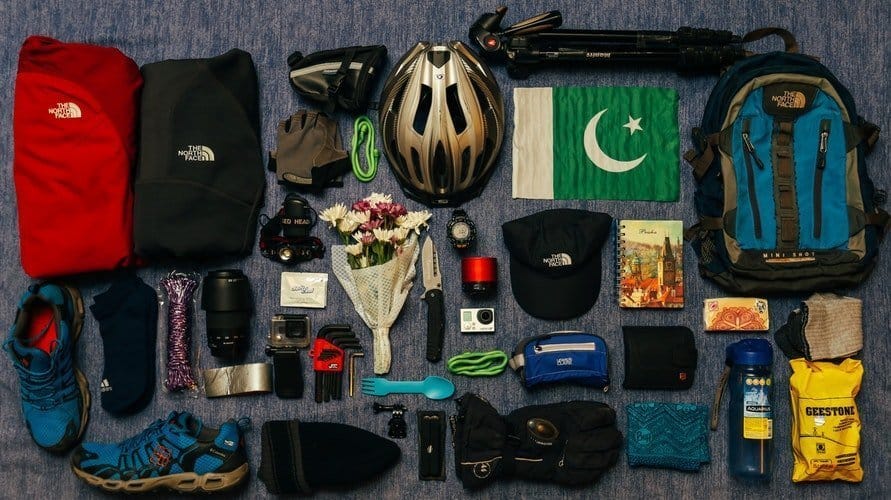
1-Overpacking

This one’s number one on our list for a very good reason: almost everyone does it! And we don’t just mean newbies—there are plenty of old-hat trail veterans out there doing their best to imitate Reese Witherspoon at the start of Wild too.
In the past we’ve seen all sort of unnecessary kit come out of fellow-hikers packs, from over-elaborate cooking setups to teddy bears, unused (even unusable!) food, tins of Red Bull, at least one copy of War and Peace (or a similarly oversized tome—in hardback, no less), and at least a few laptops and five-pound DSLRs.
While there’s always sure to be disagreement on what constitutes “necessary”, a simple rule that will hold you in good stead when gathering your gear is this: if you can live without it, you can leave without it.
Unless you happen to have your own personal Sherpa, hitting the trails for months at a time necessarily entails making a few sacrifices in terms of comforts and conveniences.
If for whatever reason, you’re unable to do so, then you’re either going to set yourself up for a true suffer-fest by carrying an unmanageable load or ensuring your trip ends prematurely owing to injury or simply having a crappy time of things owing to the weight of your pack.
2. Poor gear prep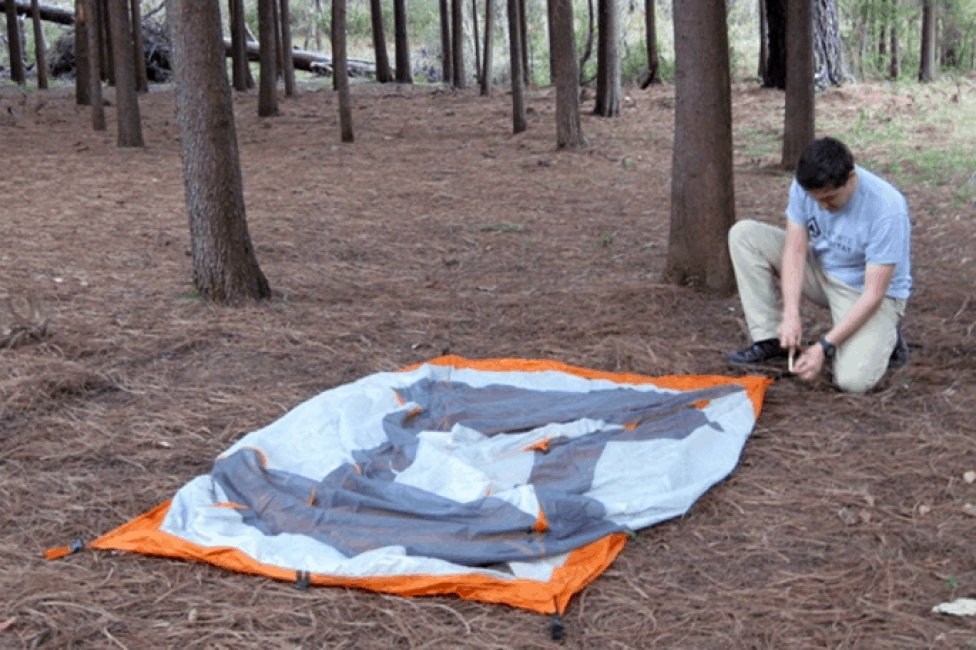
Ever been out on a hike and seen that guy/gal who’s clearly never attempted to put up their tent before and now has to do so in the middle of a howling gale or downpour?
Or the one frantically fiddling with a GPS device or map and compass without, clearly, any idea how to use them? How about that one with the shiny new boots they didn’t break in before setting off, sat nursing some scary-looking blisters at the trailside just a few days into their trek.
Our advice: don’t be that guy/gal! Before your trip, makes sure every item of your kit is trail-ready and spend some time simulating how you’ll use it while on your thru-hike: practice pitching your tent until you’ve got it down, break your boots in on local hikes, pick up a map of your local area and set yourself the task of navigating to certain points on the map using your compass.
Gear prep also extends to making sure you have everything you need for repairs and that your tent and wet-weather gear has all been reproofed prior to setting off, a process that might cost you half a day but is far preferable to discovering—and suffering the consequences of—leaks in your kit the first time the rain sets in when out on the trail.
3. Poor physical prep
“But I’ll get in shape along the way,” said just about every thru-hiker forced to abandon their adventure just a few miles or days into their trek when their body reacts unfavorably to the sudden shock of the demands being placed upon it.
To reduce the risk of your trip ending in such an inglorious fashion, at least a month or two before setting off take every chance you can get to load up a pack and hit the trails. If possible, try to throw in a couple of overnighters with all the gear you anticipate taking in order to get a feel for carrying a heavy pack and also to gain some insights into how you might streamline your camping setup.
If overnighters are impossible, hit any trails near your home and try to put in your target mileage for the day, being sure to take into account the (probable) shortage of ascent and descent and the less testing nature of the terrain.
Many city dwellers are apt to think that hitting the treadmill or step machines in their gym will pass as adequate preparation. While there’s certainly no harm in working on your cardio, that oft-quoted hiker’s motto which reads “there’s no preparation for the hills like the hills themselves” hasn’t earned its airtime for nothing…
4. Underestimating times
When planning for a trip, we’re all prone to getting a little too excited, biting off more than we can chew, and/or failing to anticipate the difficulties of long-term exertion and the multiple contingencies and variables that come into play—all of which, we might add, will slow us down rather than speed us up.
Pre-trip excitement is great, and we’d be loath to ask anyone to try to contain it, but every trail-goer, novice, and expert alike, have one thing in common: they’re human, and as such have physical limitations that need to be accounted for and accommodated with a level head when estimating our capabilities in terms of long-term exertion. As a general rule, allowing one rest day for every seven to ten days of hiking is a good policy.
Also, our daily mileages tend to taper off the longer we are between rest days, so in the days prior it’s wise to plan for 10-20% less than your max daily mileage.
Even if excitement doesn’t get the better of us, then work commitments or other time restrictions may cause us to be overly optimistic as regards our own capabilities with regards to the number of miles we can put in day after day over a period of many weeks.
Avoiding this pitfall requires some brutal honesty and acceptance of facts—take a look at the times taken by past hikers on your route and try, from these, to calculate an average duration. If that happens to be, say, 50 days and you’ve booked a total of 25 away from work, then the chances are you’re either going to be heading home to a letter of dismissal or cutting your trip short.
5. Navigation
Just because you’re on a popular trail that is walked by thousands of hikers each year, it doesn’t mean that you should take a more lax approach to navigation.
If you’re on a longer thru-hike then the chances are that at some point along the way you’re going to find yourself in poor visibility or confronted by an unsigned fork in the trail, at which point having a map and compass could save you valuable time finding your bearings or retracing your steps to the last notable waymarker.
While most of the long-distance trails in North America are very well signed, elsewhere around the globe this isn’t necessarily the case.
Many a first-time visitor to Britain, the European Alps, Nepal, Ladakh, and New Zealand, for example, is often surprised by the lack of either signage or any distinct trail and unprepared to navigate by map and compass alone. Before heading on your trek, be sure to check how well signed the trail is and always pack a map and compass even if it happens to be a standout in terms of navigation-friendliness.
Preparing for a Thru-Hike in Ten Steps

Back when I was doing my first solo thru-hike as a teenager in the late 1990s, I made most of the aforementioned mistakes.
Though I eventually completed the hike, it wasn’t without a great deal of struggle and would never have happened without the kindness of a few better-equipped and wiser strangers I met along the way.
Returning home after the trip, I recall wishing there had been someone there a few months before I set off to give me a simple, ten-step plan to guide me through the gauntlet of pre-trip logistics and prep. Such a plan wouldn’t only have saved me a lot of embarrassment, but also a long, frustrating, and expensive process of trial and error in the month or so preceding the trip.
To help you avoid the mistakes that so very nearly ruined my first thru-hike, the following is a guide to the most important considerations and must-dos that will, I hope, help to make your hike a lot less stressful and awash with elements of inadvertent self-sabotage than mine was.
Step One: Select Your Route
Our planet is awash with thru-hiking trails of all lengths and levels of difficulty. While this may make the selection process tricky and fairly time-consuming, it also means that you’re sure to find a selection of trails that are both within your capabilities and that inspire you enough to go ahead with the next step in the planning process.
When selecting your route, you’ll also have to take into account a few other variables, most notably trail conditions and weather conditions.
Asking yourself a series of questions before deciding on your route can help you gauge whether or not you’re biting off more than you can chew and setting yourself up for the proverbial fall or taking on a trail within your capabilities but tough enough to provide the desired amount of challenge and satisfaction upon completion:
1-Am I willing to leave behind all my home comforts for the duration of the hike—internet access, a bed, A/C, heating, showers, family and friends, TV, cooked (or more palatable!) dinners, etc.?
2. Can I make my hike my number one priority for the time it will take me to complete it?
3. Does this route take me into more remote territory than I’m willing to be in?
4. Do I have any health issues that might make this hike too risky?
5. Do I have enough $ to support myself for the duration?
6. What health, weather, wildlife, or other hazards are there in this region, and am I willing to/adequately trained to face them?
7. Do I have an adequate time buffer to complete the hike if, for any reason, I am delayed en route?
8. Do I have enough experience to tackle a hike of this nature?
9. Am I fit enough to deal with the demands of this hike?
10. Are there adequate resupply points and, if not, am I capable of carrying enough food between those there are for the number of days the gaps between them will require?
Step Two: Do Your Homework
Most would-be-thru-hikers are aware of the need for some pre-trip research. However, few manage to comprehend just how much homework really needs to be done to ensure their trek goes as smoothly as possible.
While many may claim detailed planning and research can detract from the “romance” of the journey ahead, we’d counter that by pointing out that there ain’t a great deal of romance in rocking up at a camping area or mountain hut only to find it closed or destroyed by a landslide or avalanche, being fined by park rangers for having no permit in an area you thought to be permit-free, or discovering all of the water on your route is undrinkable or requires filtering with a filter you don’t have!
To avoid all of the above, grab a copy of the best guidebook(s) for your planned route and cross-reference this with any online route descriptions.
If possible, also hunt down more recent trip reports to ensure the trail is still as described in the guides at every stage and to get a feel for how other hikers fared in each section. In most cases, you’ll find a few handy insights that didn’t appear in the guidebooks.
Doing your homework also applies to gear requirements. While researching your route, check the gear list of previous successful aspirants—making sure they were hiking in the same season you intend on going. You’ll probably be surprised by some inclusions or exclusions from the provisional list you’re sure to have already mentally, if not physically, by this point.

Step Three: Map Route Stages
Once you’ve chosen your route, it’s time to start familiarizing yourself with the routes within that route, so to speak. This entails breaking the trail down into manageable sections according to your schedule and capabilities and then going through each of these with a fine-toothed comb.
But exactly what is your “comb” supposed to be caught in its teeth?
Well, the objective of your detailed trial research is to avoid being taken by surprise. While most of us would just like to load up our packs and get on our way, in reality, few long-distance treks are very forgiving of those who choose to take such a breezy and nonchalant approach.
Some surprises we might find are rivers that must be forded (and are unfordable at certain times of the year), borders of permit areas, water sources, exposed or dangerous sections of trail we could have avoided, worthwhile detours or diversions, accommodation.
Detailing your trail research will also help you get a clearer picture of where you will be spending each night (handy for permit applications) and the nature of the terrain you’ll be facing on any given day, which may just save you having to put in several thousand feet of ascent to reach a planned camping location at the end of a long day. 
Step Four: Permits
Perhaps the trickiest and most mentally exhausting part of the planning process for a thru-hike is arranging the necessary permits for overnight stopovers within national or regional parks.
While permits aren’t usually required in Europe, many regions of South and Central America, or New Zealand, for those planning a thru-trek in North America and many popular trekking destinations in Asia—Nepal, India, Bhutan, and Pakistan, for example—taking care of this essential part of pre-trip paperwork can turn into a logistical nightmare.
To offer an example, hikers undertaking Utah and Arizona’s Hayduke Trail will need permits for no fewer than seven (!) national parks or recreation areas (Arches National Park, Canyonlands NP, Glen Canyon National Recreation Area, Grand Staircase-Escalante National Monument, Bryce Canyon NP, Grand Canyon NP, Zion NP).
While filling in seven sets of forms and paying seven separate fees for overnight camps in each of these areas may seem a small inconvenience, the trouble lies in getting the dates right on your application, particularly given that you might be arriving at the latter of these parks many weeks or even months after your start date.
Given that any number of things can go wrong in a single day on the trail—never mind a few months—scheduling your permits accurately is something of a lottery.
There is no way to get around this problem entirely, but in most cases, park authorities will provide a little bit of leeway for long-distance through-hikers. In the past, we’ve heard of park rangers kindly overlooking missed permit dates or, more commonly, park authorities allowing hikers to tweak their schedules while en route. To do so, the most important thing is to get your application in the system.
As the permits for some popular national parks must be booked up to three months in advance, attempting to pick up a permit from scratch while on your way there is all but futile.
If, however, your name and application are already in the system then the park administrators are usually far more forgiving and accommodating, and in most case will be able to shift the dates around if you contact them as soon as you know your expected arrival date, even if this happens to be more than a week from the original permit dates.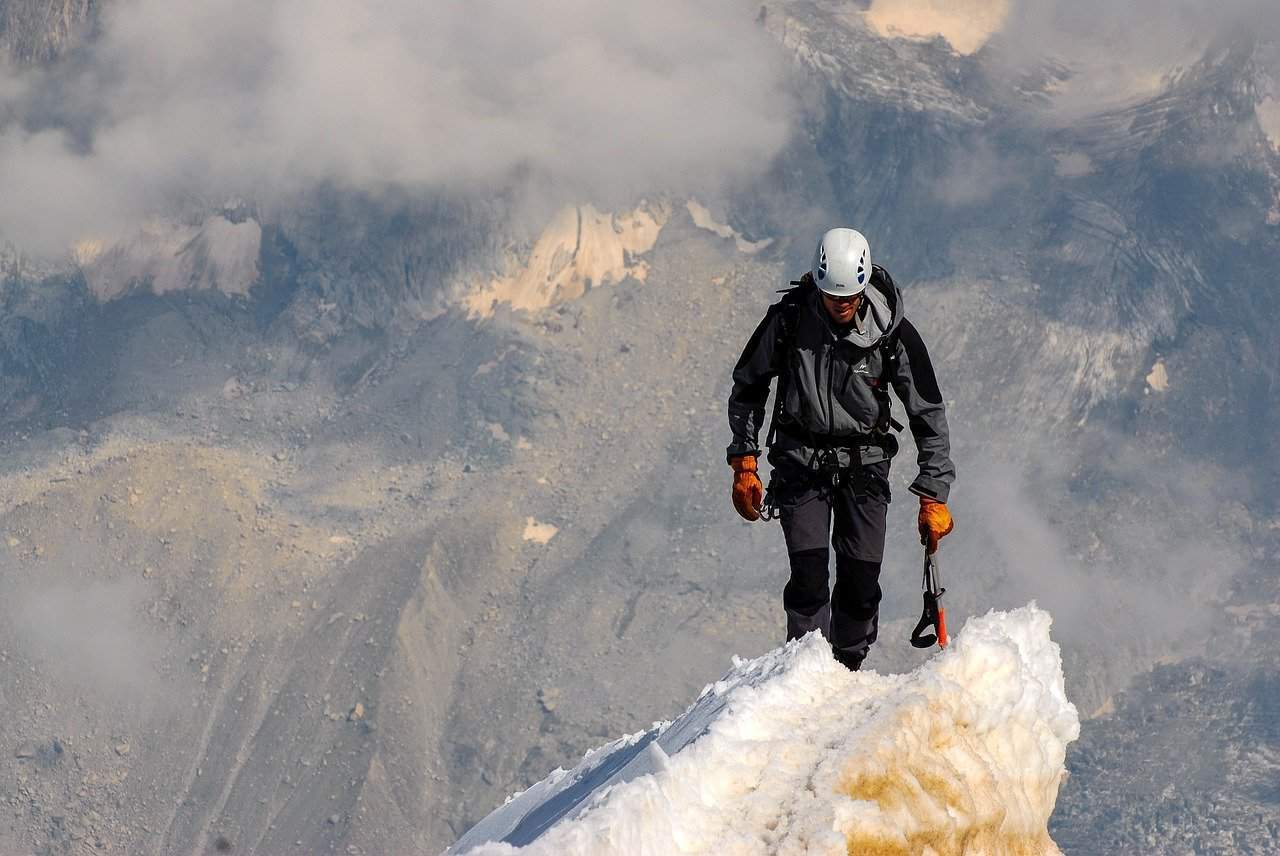
Step Five: Food
Thru-hiking sees something of a role-reversal in the usual dilemma most of us face with regard to calories and food: instead of having too many of them and then trying to do enough exercise to compensate, on a thru-hike, we’re doing so much exercise that taking on enough calories to sustain our exertions can become almost a chore.
Eating, a chore? Really? You may say. Ok, so, stuffing your face with all the goodies you customarily avoid back may in truth be one of any thru-hike’s high points. Carrying all those goodies, on the other hand, certainly ain’t!
Resupply points
The first point of note with regard to food logistics is identifying resupply points. While some thru-hikers choose to go down the mail-drop path and have boxes of supplies sent to various locations along their route, we’d recommend weighing up the practicality and cost of doing so against buying directly from stores—the chances are that if there’s a place you can have your mail stored in any town or village there will also be somewhere to pick up the bare necessities required in terms of victuals to see you through to the next resupply point. This, of course, all depends on how fussy you with regard to what you eat.
Calorie calculations
The second pre-trip step you can take with regard to food supplies is to calculate just how many calories you expect to be burning in any given day and then use this to calculate just how much food you need to be carrying. A very simple formula for thru-hikers goes as follows:
Body weight (in pounds) x 20-25 calories per pound per day
e. 200lbs x 20-25 = 4,000 to 5,000 calories per day required
- Food choices: We each have our own tastes when it comes to what we put in our bodies. However, certain foods lend themselves to the demands of thru-hiking more than others. In a few words, calorie-dense foods are the ideal choice because they take up the least room and offer the best weight-to-calorie ratio. At the same time, you want to make sure you are getting enough of the three major food types, proteins, fats, and carbs, at a ratio in the region of 1(P):1(F): 2 (C).
Step Six: Logistics
A number of other logistical matters need to be taken care of before finalizing your plans for your hike: food drops, accommodation, start and finish transfers, and support.
Food drops
Arranging for your first mail drop of supplies is usually easy enough done given that you’ll be arriving at the point of collection shortly after the parcel’s arrival. If, however, you’re likely to be arriving at any drop point several weeks or months after sending, there’s a chance that the recipient of that parcel may grow tired of waiting or the parcel will be returned to its sender.
To get around this potential problem, find a charitable and reliable volunteer back home who can send your parcels on prearranged, scheduled dates so they’ll be delivered to collection points closer to your estimated date of arrival.
Accommodation
On a multi-month hike, few hikers are hardy enough to stay the entire course without a night or two in a “vortex”? In trail-speak, a vortex is any haven of comfort which trail-goers are drawn to and subsequently find hard to leave.
While this may seem like a cop-out to the purists, for first-time thru-hikers a hotel, mountain hut, or just a comfy campsite can provide the ideal rest stop to recharge batteries for a day or two before resuming their adventure.

- Transfers: starting in one location and ending in another, maybe hundreds or thousands of miles distant, can pose a few problems. Be sure to do a little research about public transport to/from the trail’s termini and add the cost of tickets to your overall calculations.
- Support: having someone you can touch base with every so often or call in the case of an emergency is never a bad thing. While some say this detracts from the experience of the “freedom of the trail,” even if you never get around to using them, knowing there’s someone who can help in case of any difficulties should they arise can be a mind-settler—and, of course, a life-saver should things happen to go seriously south and you’re hiking on your lonesome.
Step Seven: Funding
Why you might ask, has it taken us so long to bring up the big question of bucks? Many of us are apt to breezily calculate undercooked figures at the outset of the planning process, only to then be forced into starting from scratch once our research has granted us a fuller, more accurate picture of what demands our planned route will place on our finances.
Compared to other pursuits, thru-trekking is a very low cost, but that doesn’t mean it is by any means cheap. When figuring out your finances, be sure to account for all of the following:

- Bills at home while away
- Transfers: the trip to a trailhead and back home from the trail terminus
- Food for the duration
- Permits
- Mail drops
- Any off-trail accommodation along the way
- Emergency/contingency fund
- Insurance (if headed overseas)
- Gear purchases (pre-trip)
- Gear replacement during the trip
- End of trail party!
Step Eight: Gear Selection
Selecting your gear for your thru-hike is often one of the most fun parts of the pre-hire process. The best advice we can give anyone, however, is this: don’t buy anything! At least, that is, until you know exactly what you need (and what you really don’t).
While this may seem a curious note of caution given that you may be short on several pieces of kit that are sure to be necessary, we’ve placed this step far down the line of the planning process with good reason. That reason? Many of us are prone to rush out and buy everything we think we’ll need before being well enough informed about what our planned hike will require in terms of gear.
The bottom line, again, does your research. Get online, find and compare the gear lists of as many past hikers of your route as possible, and build your own gear list from there.
Step Nine: Plan B
Many of us are familiar with the quote “no plan survives first contact with the enemy.” Although spoken with regard to military affairs over a century and a half ago, the wisdom contained within the maxim is just as applicable to thru-hiking.
Rarely, after all, does a journey covering hundreds or thousands of miles over the course of several weeks or months go entirely as we anticipate.
Some just what’s the take home with regard to planning for our thru-hike?
In short, flexibility is key. Rushing to meet prefigured camping locations or setting off in foul weather to keep up our daily mileage goals is sure to land you in trouble or lead to burnout in a hurry, and is not, therefore, a course of action we’d recommend. Other variables like environmental issues (flash floods, snowfall, heatwaves), injury or illness, gear issues (ripped tent, destroyed boots), mean that having a little “give” in our itineraries is always a good policy.
One of the surprisingly fun aspects of trail life is learning how little control we have over outcomes. Good sh*t happens, bad sh*t happens—our say in which of the two befalls our trail time is precisely zero. This leaves us with a choice—act, accept or suffer in silence.
We’d highly recommend you skip the last option, something which might be achieved by availing yourself of either option one or option two. If you can take action to improve any situation, then do so, as long as it doesn’t involve putting yourself or others at unnecessary risk.
In the case of environmental or weather-enforced delays, however, in most cases option two (“accept”) is the only viable course of action (or, more likely, non-action!), and spending several hours or even a day or two holed up in your tent waiting for better conditions should not be seen as a luckless imposition on your adventure but an integral part of it.
Having a “Plan B” can be as simple as incorporating a few “buffer” days into your long-view planning or as complex as identifying potential escape routes in case things should go seriously south.
Step Ten: Take care of loose ends at home
Setting off into the wilds for long periods of time poses a major disruption to the routines and obligations most of us are familiar with and few us are quite so blessed in terms of freedom that we can pack up and leave without a thought to what we’re leaving behind.
Discovering you’ve forgotten something while halfway through your thru-hike, of course, could easily throw a small spanner in the works or, depending on what loose end you haven’t tied, entirely derail your adventure.
A few obligations you might want to add to your list of pre-trip to-do’s include:
- Find someone to feed the cat and water the plants
- Set up payment for bills
- Leave car keys for friend/neighbor in case car needs to be moved
- Find someone to check on the house every so often (or, even better, a short-term renter to offset costs!)
- Turn off gas
- Out of office email reply
- Advise neighbors and friends that you’ll be gone for X weeks to avoid any scares
- Leave a route itinerary with someone back home so they know when you’ll be contactable if need be


Thru-hike FAQs
Boots or trail shoes?
Although certain research has surfaced in recent years making great claims for the benefits of wearing lighter shoes (an added pound of weight in your shoes is equivalent to ten in your pack), there are plenty of reasons why using lightweight boots is a far more convenient, practical, and safer option.
Irrespective of where your hiker happens to be, the chances are it will entail covering a great deal of rough terrain of the type that can put a lot of strain on your ankles and the muscles in your feet and lower legs, particularly when carrying a heavy pack. This being so, support and stability become the two foremost features you need from your footwear and, thus, full-height boots are always a better option.
Additionally, the likelihood of enjoying dry conditions from start to finish and not encountering some form of waterlogged ground or section of trail beset with sock and shoe-soaking wet foliage are slim to none, even in the more arid portions of the globe. To avoid blisters, chills, or simply save yourself a few days of squelchy soles while waiting for your shoes to dry out, we’d advise opting for full-height boots.
Should I take a map and compass?
Undoubtedly yes! Even if the trail is well signed and you’re carrying a GPS device, it’s always best to have a back up in case you lose the trail in low visibility, want or need to take a diversion, run out of batteries, or somehow break your device.
Should I take bear spray?
Many thru-hikers carry a can of bear spray to give themselves peace of mind, but very few actually ever get the chance to use it. While some will argue that the “Sod’s Law” requires that you’re sure to find yourself face to face with one of the big fellas should you choose not to carry bear spray, plenty of others would argue that, in the case of black bear attacks, at least, other safety measures and avoidance strategies make carrying a spray unnecessary.
My advice is to first check park regulations on the bear spray to ensure it’s actually legal to carry the spray with you, as certain national parks (Yosemite NP, for example) now prohibit the use of the bear spray.
Secondly, I’d say carrying a can of bear spray is advisable if you’re going to lose sleep at night or feel nervous while out on your hike without one—though I have only come face to face with a handful of black bears in over 20 years on the trails, I always carry a can of bear spray when in bear country simply because I want to know I’ve done everything in my power to ensure my own safety and that of those I’m hiking with.
Finally, if you’re headed into grizzly country, then the answer is simple: don’t even think about setting off without one! 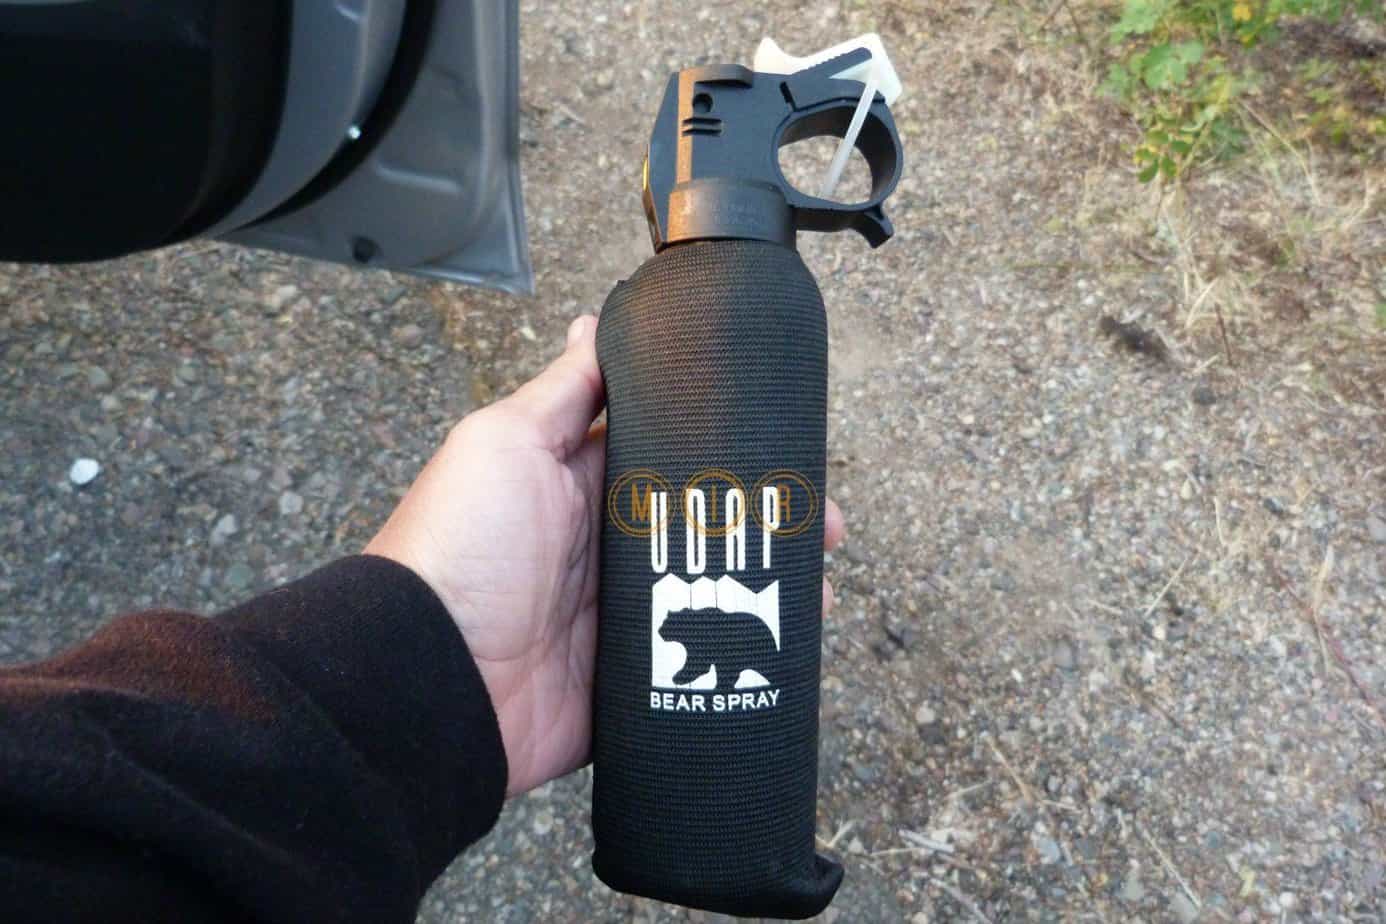
Should I take a cell phone?
The polemic regarding the use of cell phones in the backcountry rages on. While the no-phone advocates lament the detraction from purist goals of self-sufficiency and a true wilderness experience entailed by cell-phone use, those on the other side of the spat stress that the backcountry throws up enough obstacles and threats to our well-being without handicapping ourselves by failing to make use of every resource at our disposal.
Personally, on this one, I take the “pragmatist” point of view, which essentially places me somewhere in the middle of the two.
While I’d hate to think I was detracting from my experience or other trail goers experience of the wild by introducing anomalous elements of technology, I’d also hate to be left without a hope in hell of evacuation should anything happen to go seriously wrong.
Given the above sentiments, when on a thru-hike I take my cell-phone along for the ride but only take it out of my pack in case of emergencies and once every few days to check my messages for any important news from home.
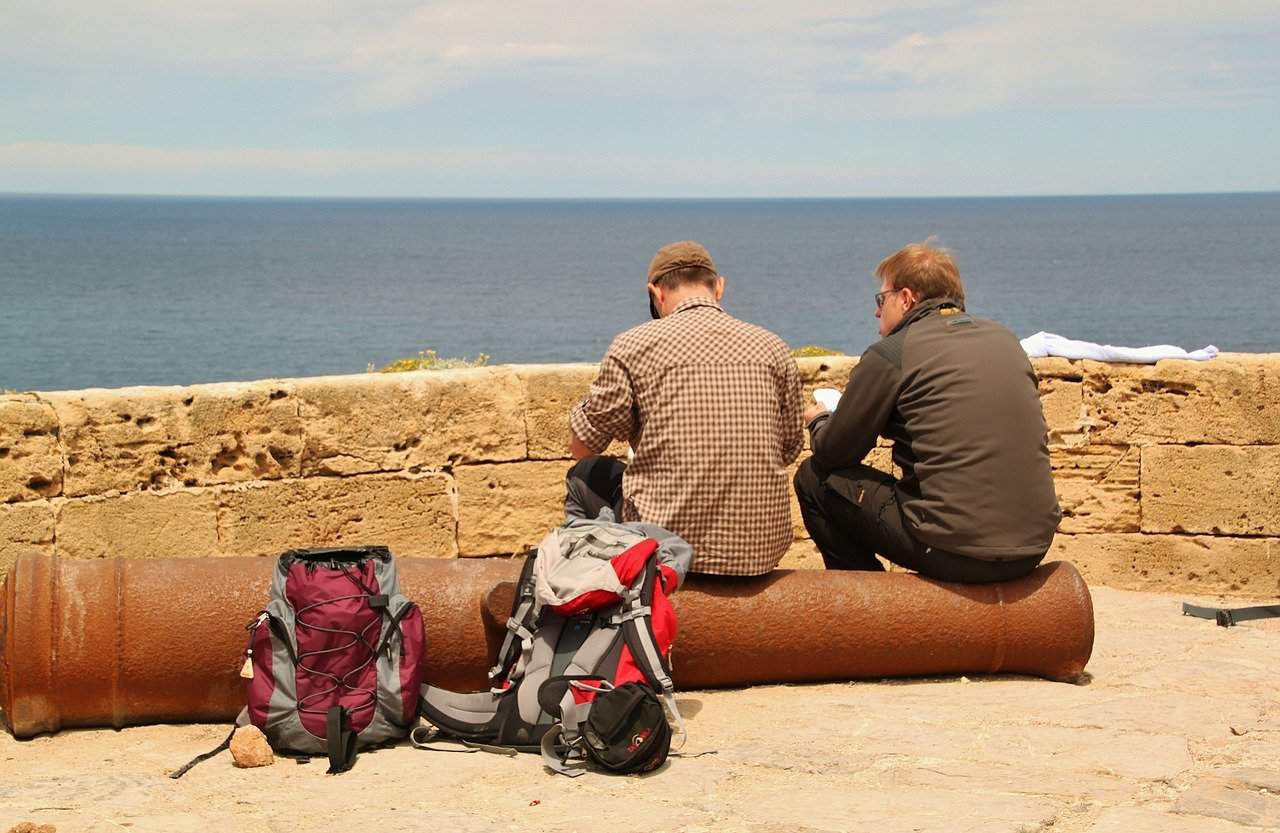
Solo or with a partner?
Hiking with a very good friend or partner can be a wonderful experience. You have someone with whom you can share the highs and lows, can pick you up when you’re going through the inevitable mental fatigue or half-way slump or bad-day blues, share the burden of gear carrying and pre-trip planning, help you avoid going nuts on those long stretches when you see nobody for maybe days on end and also, of course, can take care of you or raise the alarm should the proverbial poo hit the fan.
But there’s a “but”…a big one.
Completing a thru-hike with a friend isn’t like doing a day hike with them, or even a weekend trip or a week-long hike. It’s exactly like being with them non-stop, without interruption, day and night for weeks or months on end.
Loneliness might no longer be an issue, but killing each other suddenly comes within the realms of possibility! This, of course, all depends on the nature of your friendship and the strength of your bond.
If trekking with a partner, a good idea is to set a few ground rules, the first of which is to give each other space to enjoy all aspects of trail life on their own to the extent they wish to do so. This could mean separating and joining up with others for a few days at a time, sleeping in separate tents, or simply walking a few hundred yards apart when on the trail.
Should I take my dog?
While taking on a long thru-hike with your four-legged friend is a very rewarding and enjoyable experience for human and hound alike, a handful of significant considerations need to be taken into account before doing so.
- First up: food. Given that you’ll already be carrying a hefty load of grub for your own needs, are you going to be able to carry the extra load required for those of your pooch?
- Secondly: Hazards. Are you prepared to place your dog in the firing line of the various risks that go hand-in-hand with backcountry travel—attacks by other animals (bears, snakes, cougars, etc.), falls on exposed sections of trail, hypothermia, overheating, etc.?
- Thirdly: regulations. Will you be allowed to hike with your dog through all of the stages of your route?


As with every consideration we’ve mentioned above, do your research, then think long and hard about whether or not the benefits outweigh the potential risks and drawbacks.
Further read:

The All-Outdoors Guide team is comprised of enthusiastic experts that enjoy helping others that aspire to be better at outdoor fun. Part of that is making sure you have the right gear and information when it’s time to go out and have fun. Some of our team have accomplished amazing feats like climbing 6000 feet to the top of mountains, others have explored every dirt trail they could find and we even have some people that have backpacked solo on various continents. No matter what our readers want to learn and do, our team is here to help them accomplish those goals.